1. Download the Soil Test Pro Mobile App and Sign Up for an Account.
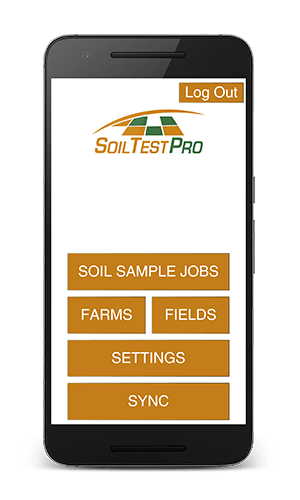
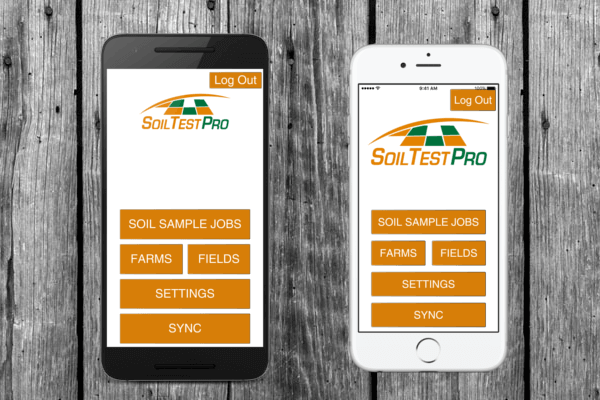
Soil Test Pro is a two part system: The Soil Test Pro Web Headquarters on your computer and the Soil Test Pro Mobile App for your mobile device.
Use the same username and password created during the signup process to login to your Web Headquarters and your Soil Test Pro Mobile App. If you forget your username and password, call us and we will remind you.
![]()
![]()
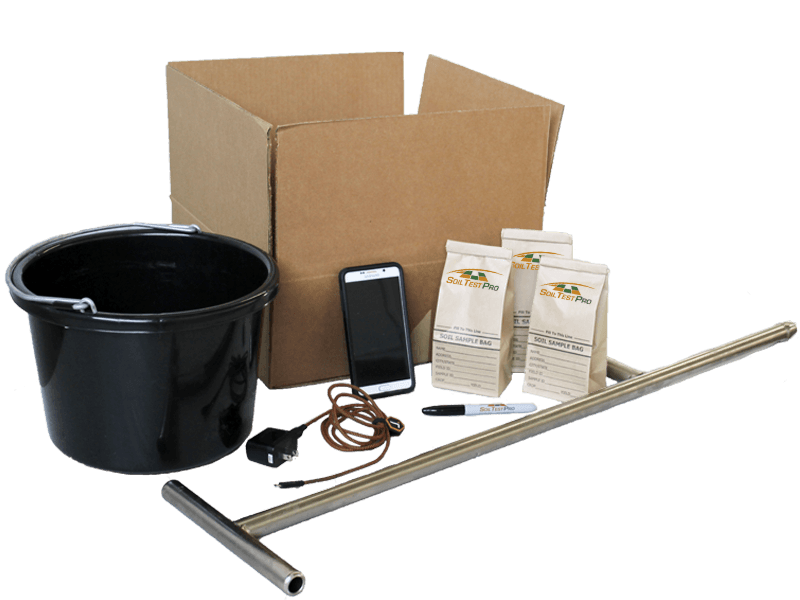
2. Order Soil Sampling Supplies.
To order, Call us at 855.768.2900.
We have all the soil sampling supplies you need: soil probes, soil sample bags, shipping boxes, shipping labels, and answers to any questions you may have.
Order now so you’ll have your supplies when you are ready to begin soil sampling.
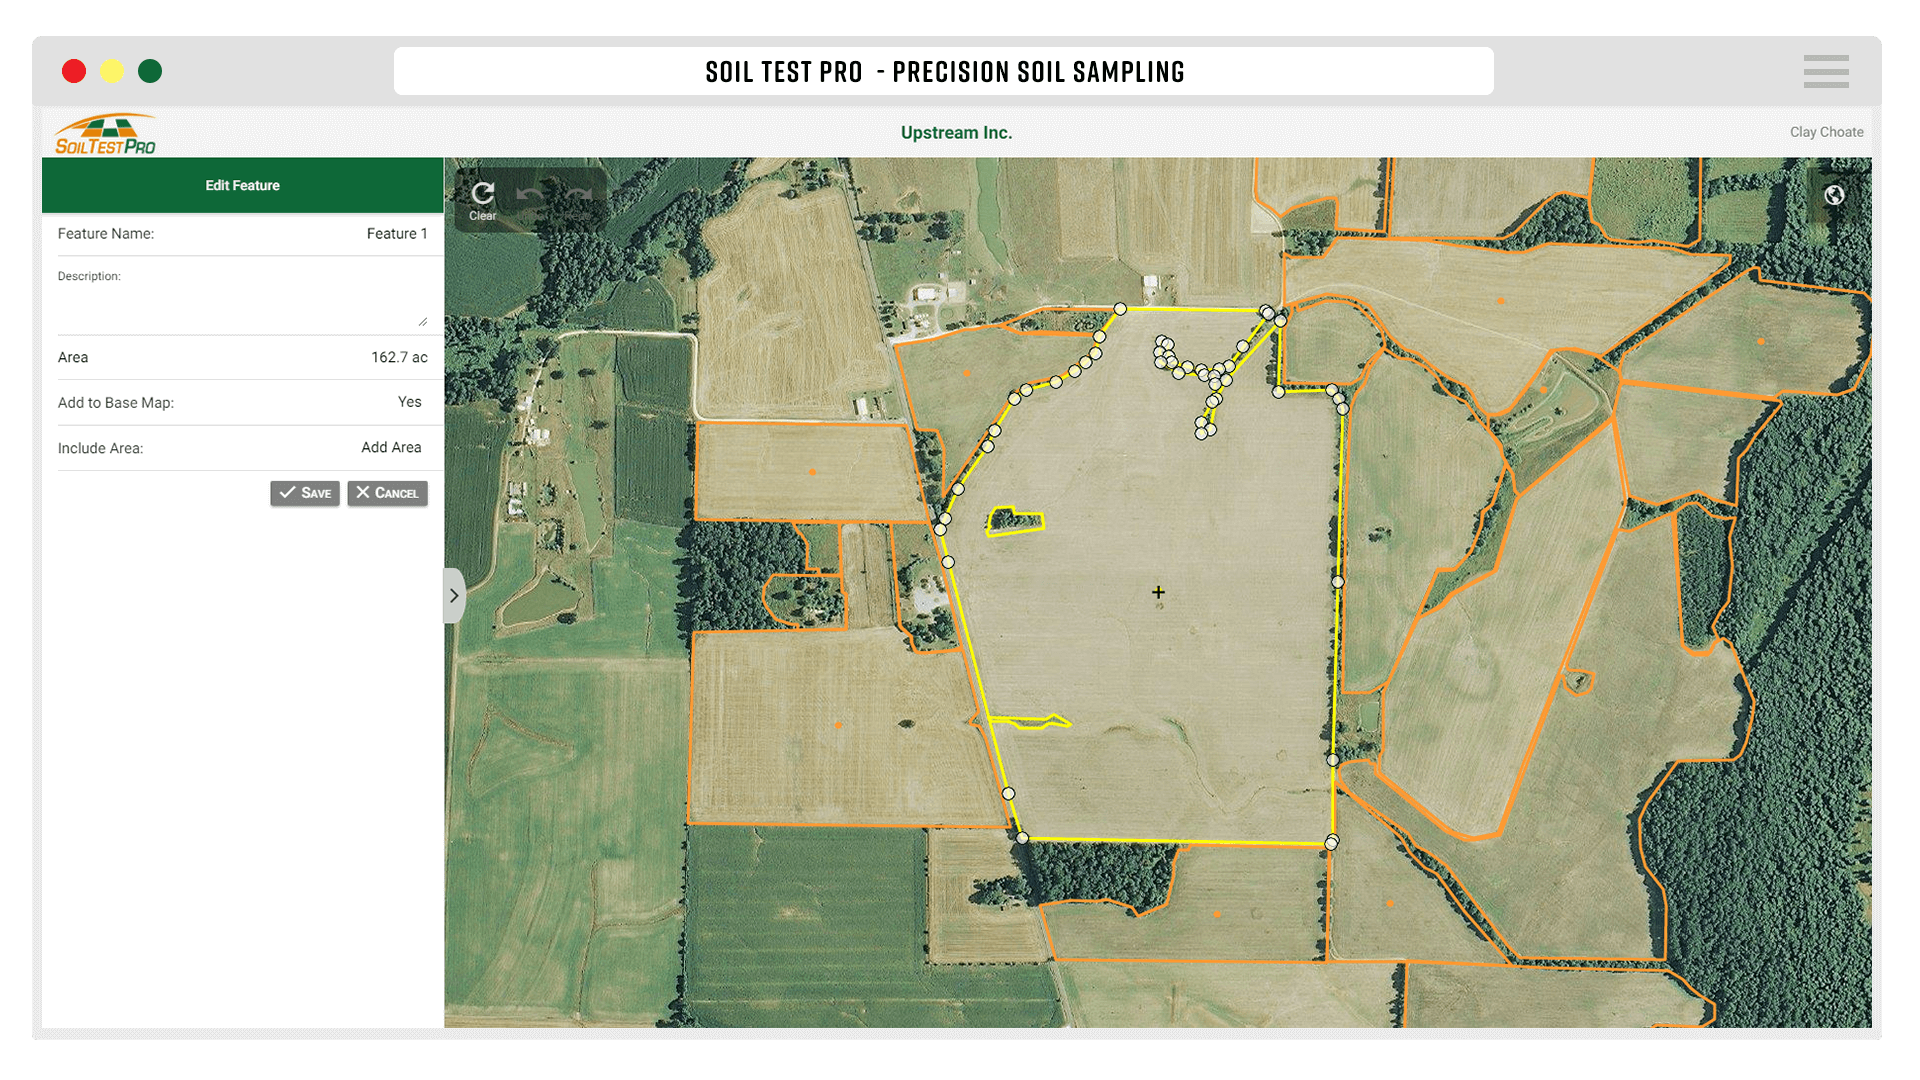
3. Draw your Fields.
Draw your Fields online from your Web Headquarters -OR- GPS your Fields with your Soil Test Pro Mobile App.
On your Web Headquarters, choose FSA boundaries so you can quickly add your Fields using the Quick Pick tool -OR- manually draw your Fields using the Draw Manually tool.
On your Soil Test Pro Mobile App, you can GPS your fields. Once you have arrived in the field you wish to GPS, tap the GPS Boundary button. The red, GPS U-Dot will appear with a compass arrow on your screen. This represents where you are in the field at all times. The U-Dot will track your location and GPS the field boundary as you walk or drive the perimeter of your field.
![]() GPS U-Dot
GPS U-Dot
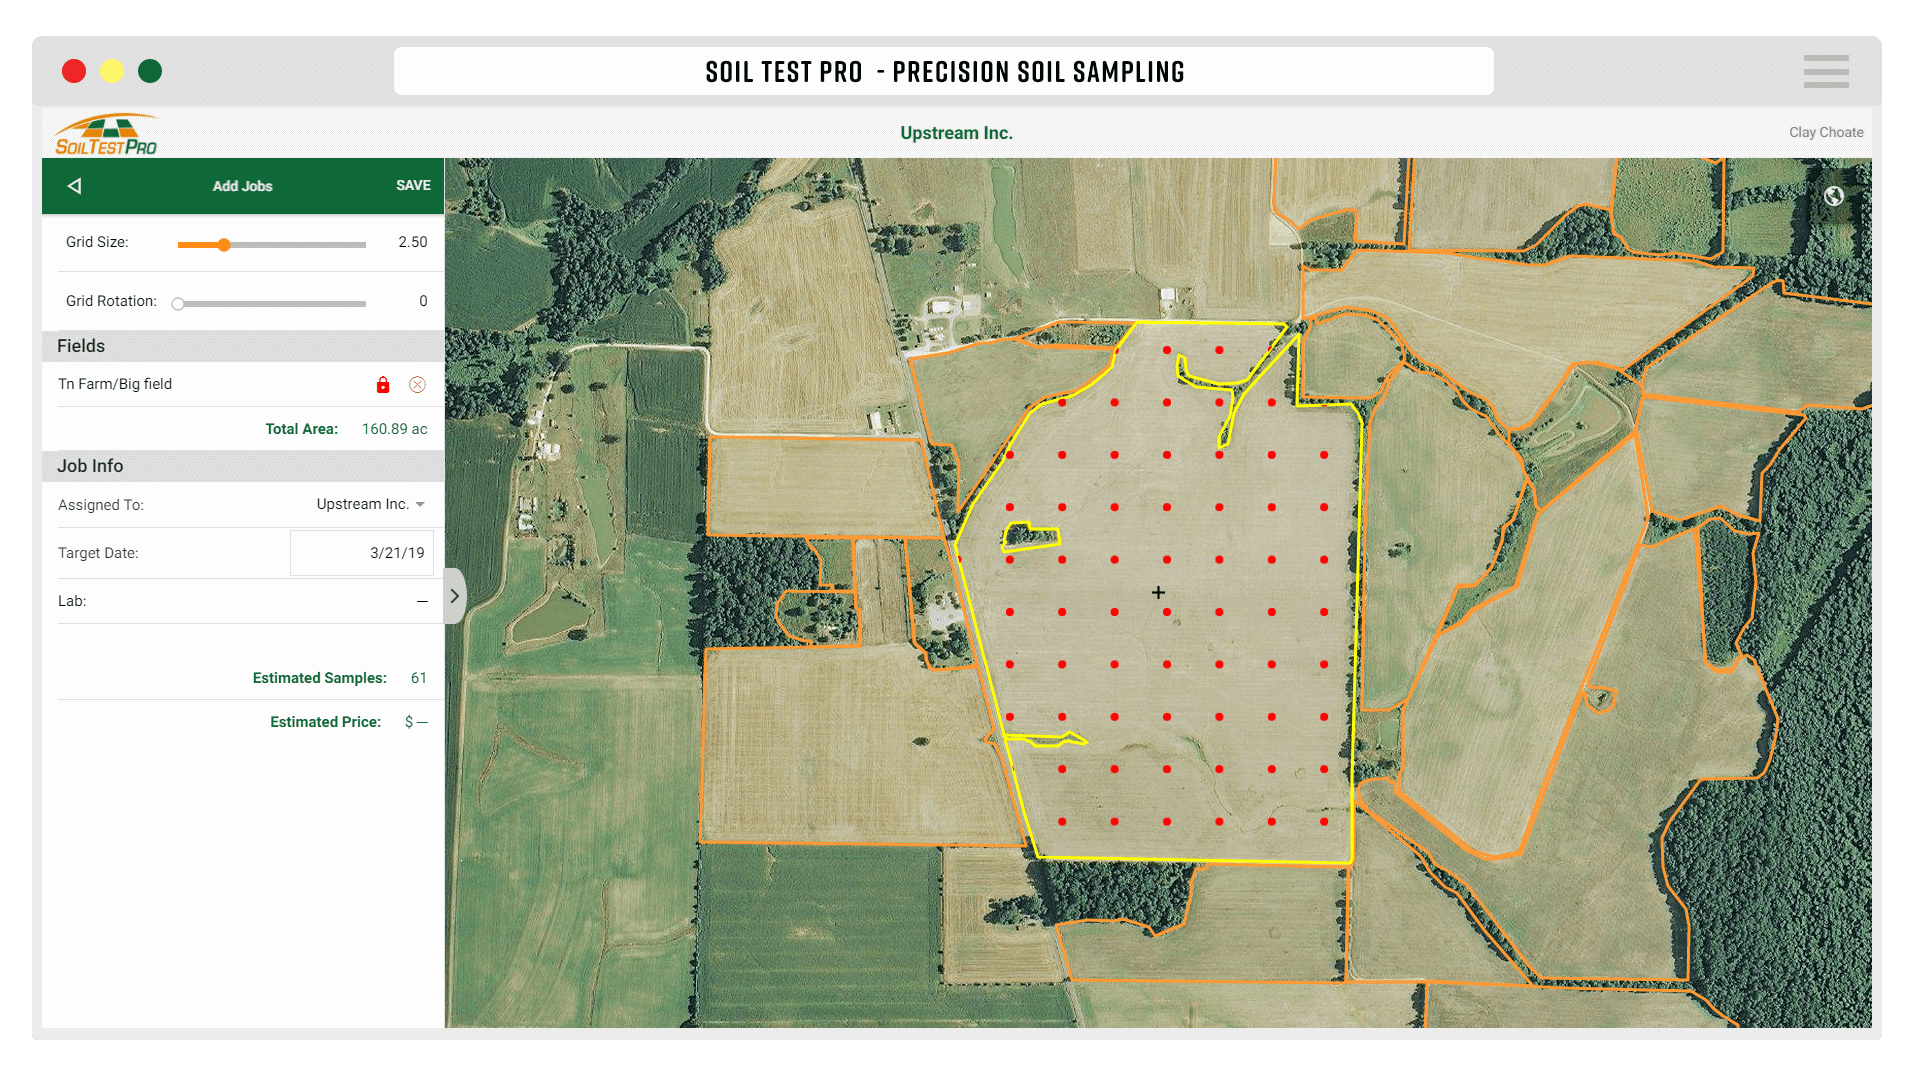
4. Create a Soil Sample Job.
Once you have drawn your Field, there are two ways to create a Soil Sample Job: from your Web Headquarters -OR- from your Soil test Pro Mobile App.
To build a Job from your
Web Headquarters:
To build a Job from your
Soil Test Pro Mobile App:
5. Go to the Field and Start Soil Sampling.
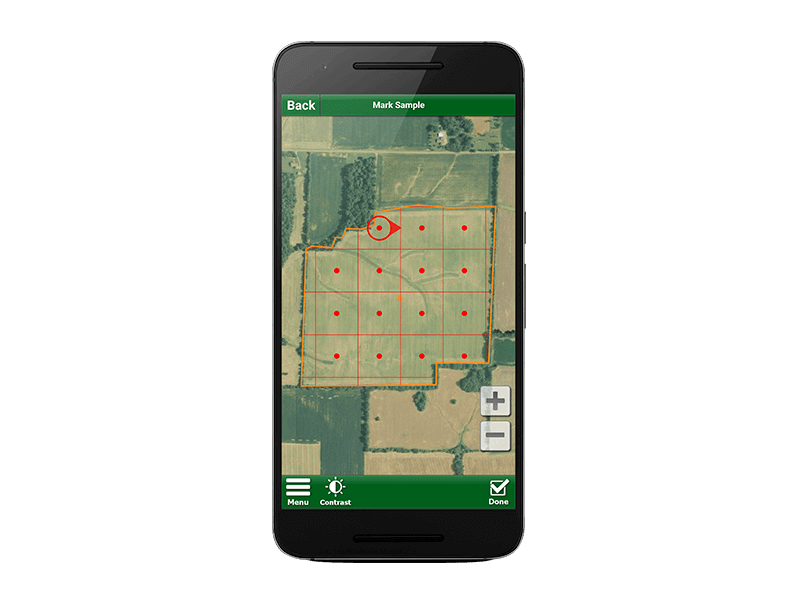
Open the Soil Sample Job on your Mobile Device and head to the first sample point. When you are inside the field boundary, the GPS U-Dot will appear. This represents where you are in the field at all times.
REMEMBER to take these with you to the field:
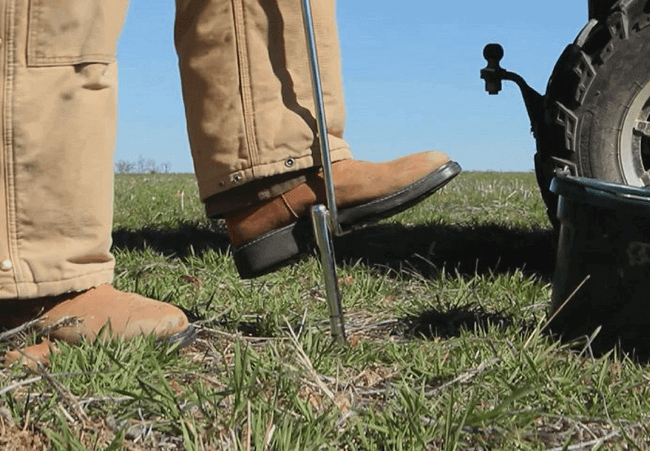
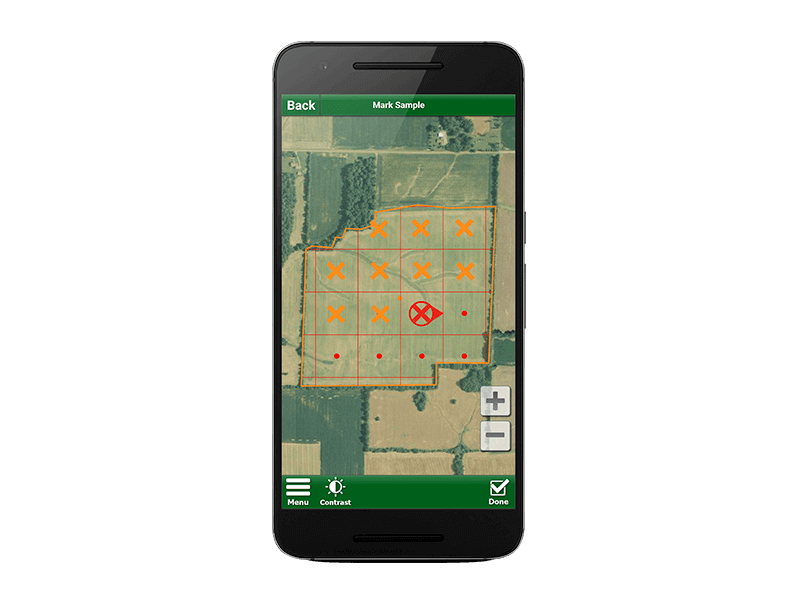
6. Pull your first Soil Sample.
When you arrive at your first sample location, center the sample point in the GPS U-Dot and tap Mark. Pull 8-10 cores. These cores will make up one sample.
When you tap Mark, GPS records the latitude/longitude coordinates. You can follow the grid or sample in your own pattern. REMEMBER: the grid is just a guide. Avoid non-representative samples.
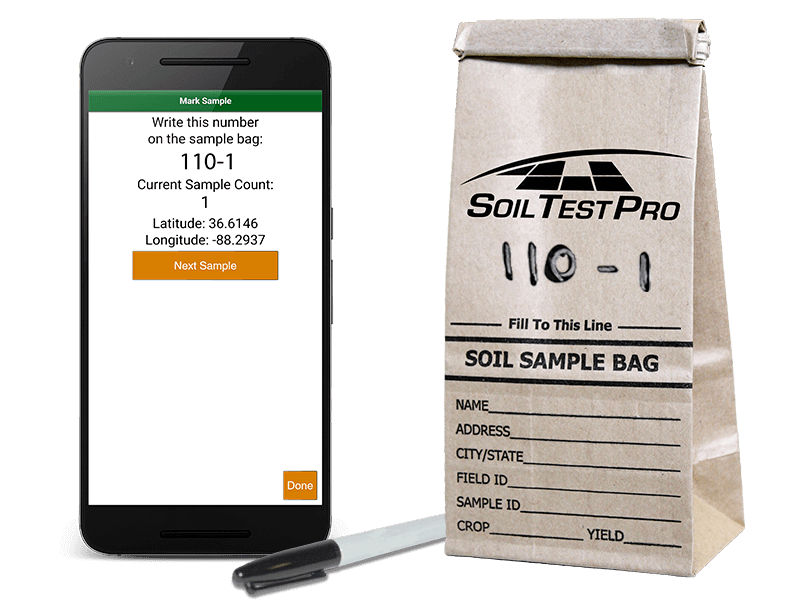
7. Write the Sample Point Number on the bag.
At each sample point, a number is provided on your Soil Test Pro app.
This is the only information you need to write on the bag.
8. Navigate to the next Sample Point.
Continue sampling (repeat steps 6 & 7) at each sample point until you have finished the field.
When you have sampled each point indicated on the grid, you are finished with this field.
Soil Test Pro Mobile App Legend:
- Points you have already marked
- The last point you marked
- Grid points or points yet to be sampled
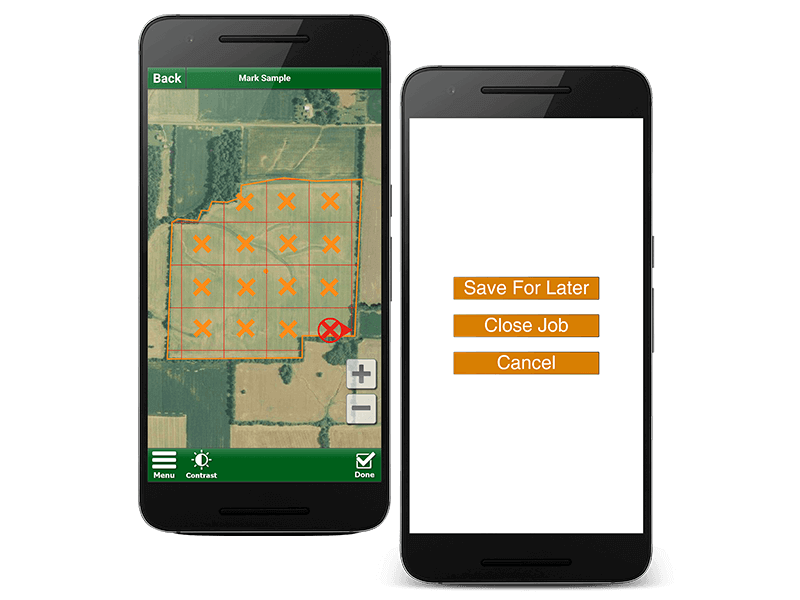
9. You’re finished with this Field. Close the Job.
When you are finished soil sampling, tap Done then tap Close Job. You have successfully completed the job! Now you are ready to soil sample another field -OR- you are ready to order your lab test and ship the soil to the lab.
When you have a good connection, SYNC your mobile device. This will keep your data safe and consistent on both your Web Headquarters and Soil Test Pro Mobile App. Once you have SYNCED your mobile device, you are ready to order your lab test on your Web Headquarters.
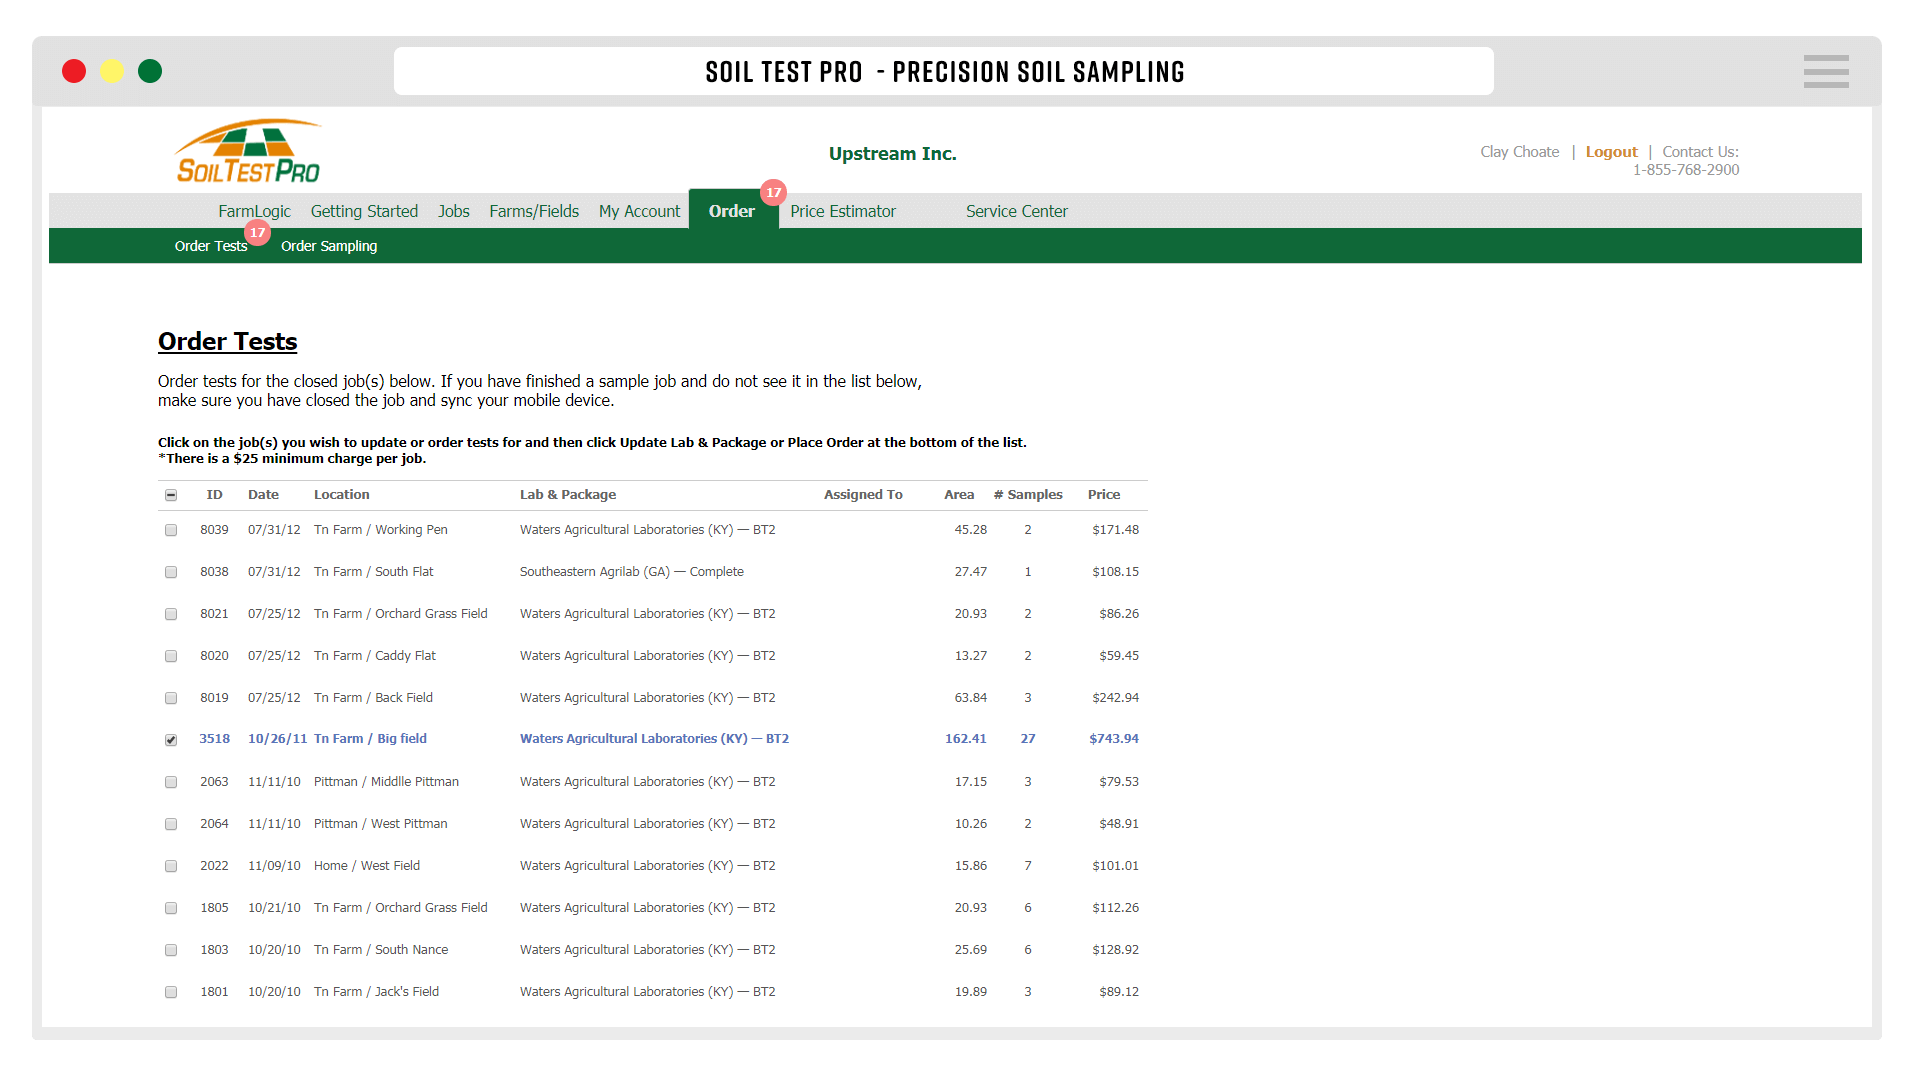
10. Order your Lab Test Package.
To order your lab test package, login to your Web Headquarters and simply click on the Order Test tab. Click on the job(s) you wish to order lab tests for and click Place Order at the bottom of the list. Next, fill out the appropriate payment information to complete your lab test order.
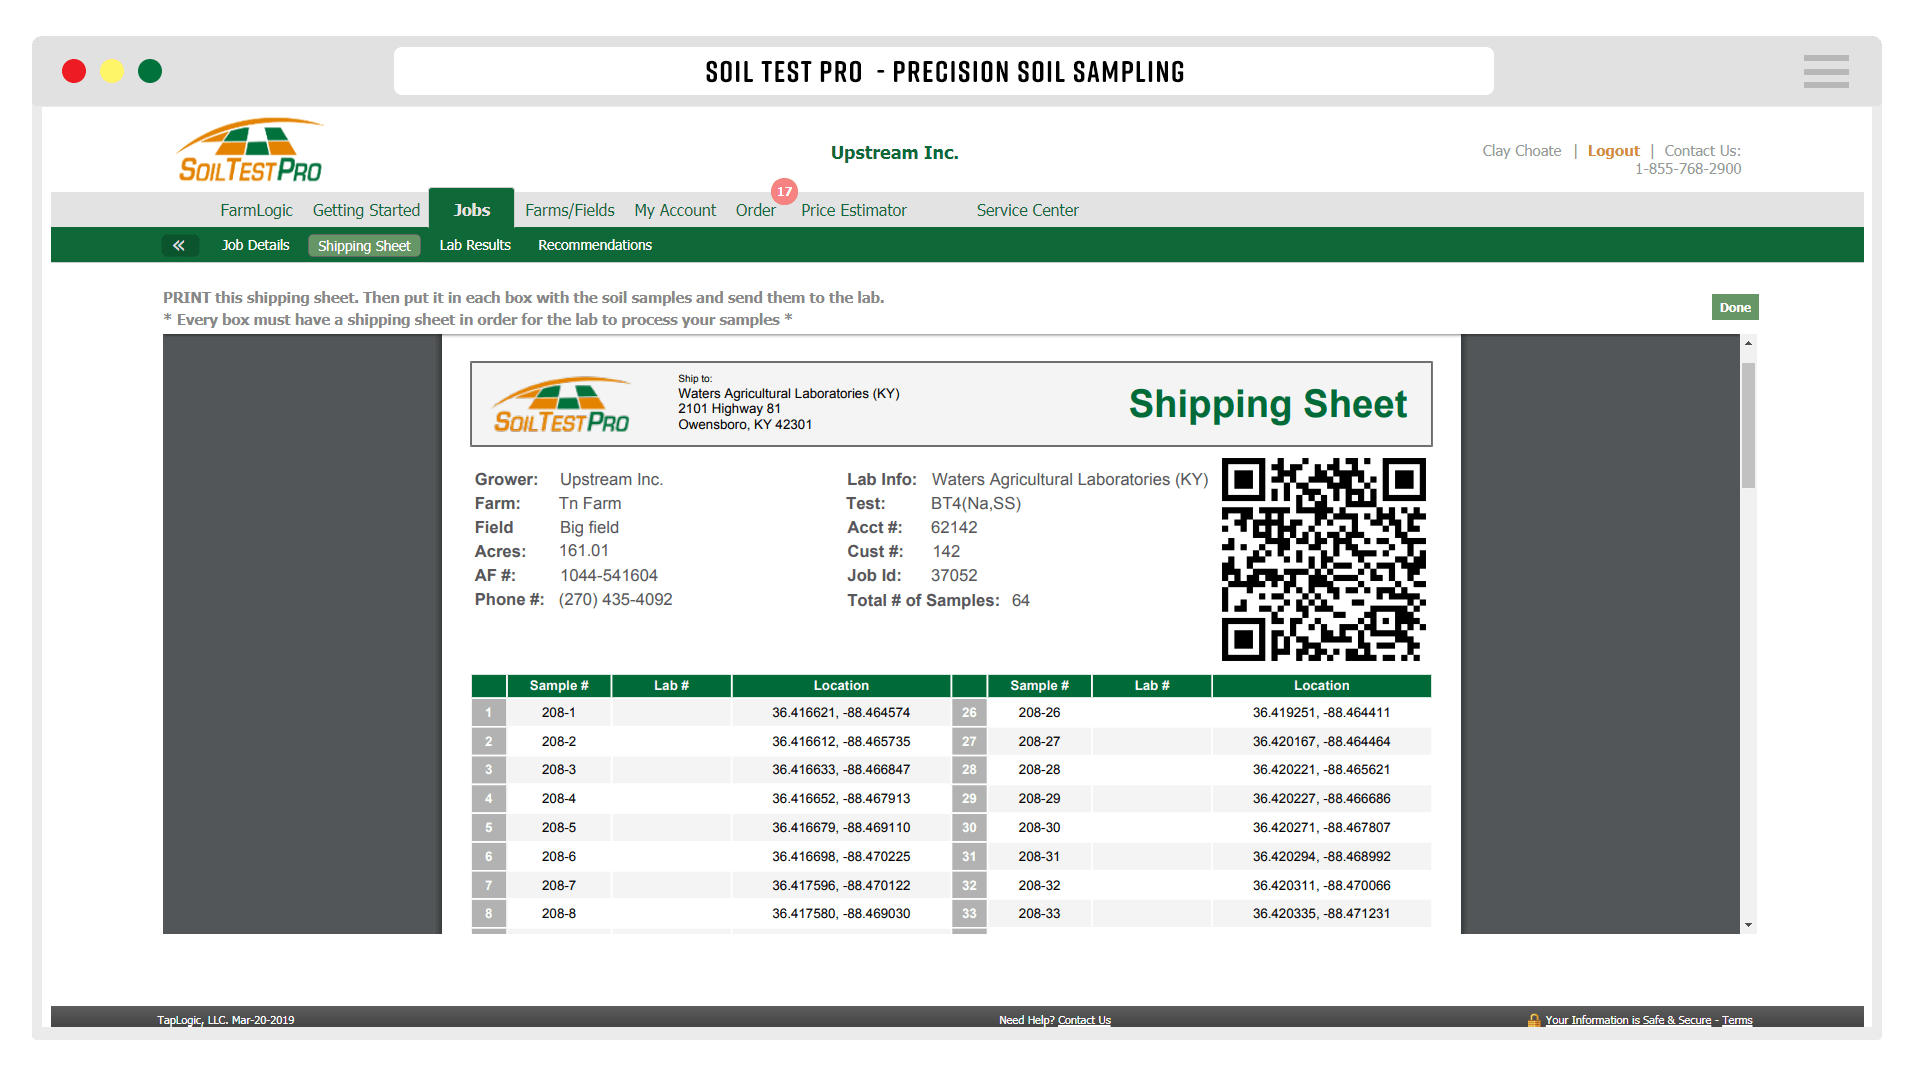
11. Print a Shipping Sheet, then ship your Soil Samples.
Click on the Jobs tab to print a shipping sheet. Check your samples against the sheet. Place the samples and shipping sheet into the box. Tape the box securely and apply the prepaid shipping label.
REMEMBER: put the shipping sheet in the box.
Fill the box completely full of samples. Be sure to check your samples against the shipping sheet. If you have more samples listed on your sheet than will fit in a single box, place them in a second box. Include the same shipping sheet in both boxes. If you have multiple jobs in a box, include multiple shipping sheets in the box.
12. Receive Your Lab Test Results.
Your test results will be on your Web Headquarters in 3-5 days. Now you know!
Use Soil Test Pro to build Recommendations, Variable Rate Prescriptions and Controller Files for 30+ leading monitors and controllers. We are here if you need us. Call our Precision Ag Specialists anytime, 855-768-2900.
Take These to the Field